Thunderbird 115 “Supernova” ships with brand new layout options to give you a more beautiful and more productive email experience. But those new options aren’t on by default (for now), out of respect to those who have grown comfortable with Thunderbird’s Classic View throughout the years. Fortunately, getting that shiny new “Supernova” look is accomplished in just a few seconds. In this short guide, we’ll show you how to do it!
Step 1: Turn On Vertical View

First, click on the App Menu (≡) and choose “View”, followed by “Layout,” and then select “Vertical View.” This will rearrange the Folder pane, Message List pane, and Message pane to be displayed side-by-side.
Step 2: Turn On Cards View

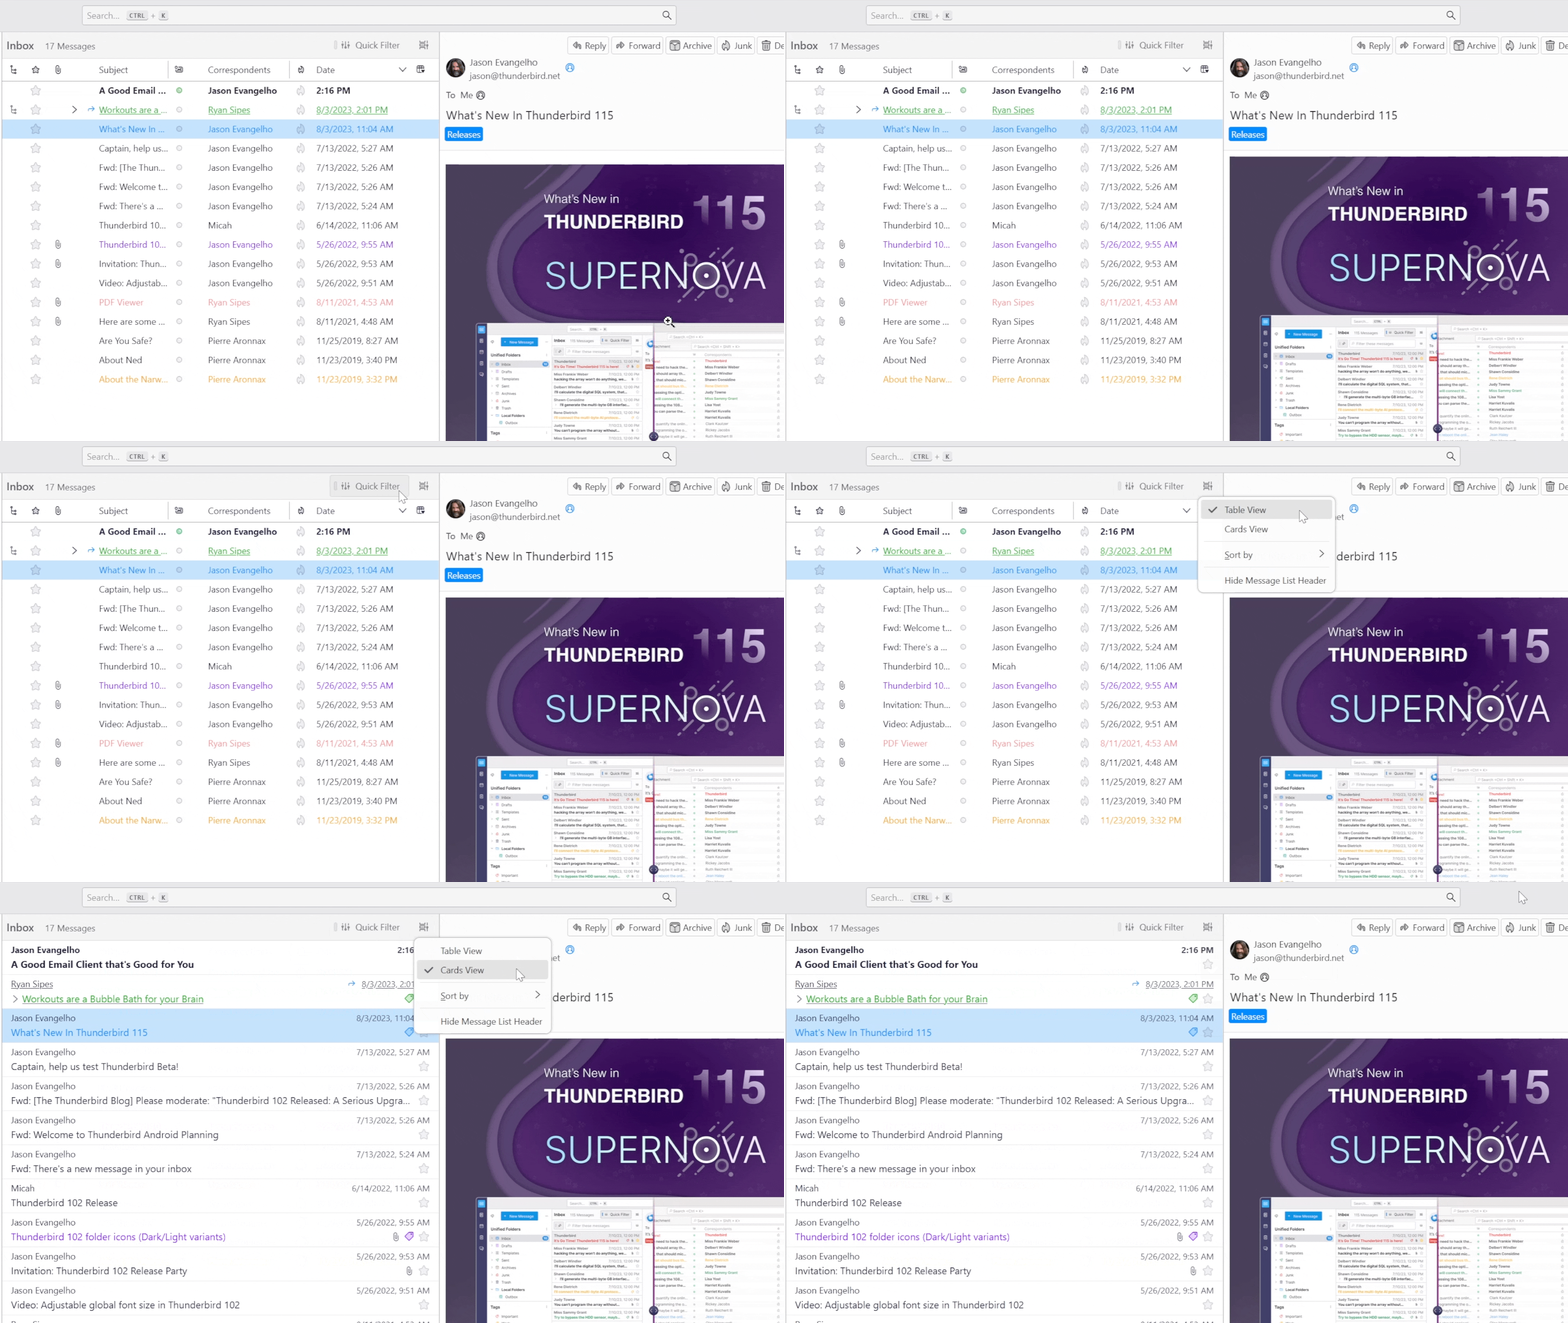
Next, let’s switch on “Cards” view. This new way of displaying your message list is simpler and more compact, to help reduce cognitive burden when you view the list. And it’s easy to activate.
Look immediately to the right of the “Quick Filter” area for the “Message List Display Options” icon. Click it, and select “Cards View” as seen in the GIF above.
Cards View is still in active development. More features such as a message preview line and sender avatars will be added in the future.
 TIP #1: Are you having trouble finding that menu? The area of Thunderbird where you activate Cards View is called the Message List Header. Some people choose to hide this section to reclaim a bit of vertical space. It’s easy to get it back: Just return to the App menu (≡), then select View
  Layout, and make sure that “Message List Header” is checked ✓
 TIP #2: Cards View is also available when using Classic or Wide layouts.
Step 3: Turn On “Tags” Folder Mode

If Tags are an important part of your workflow, now it’s easier than ever to access them.
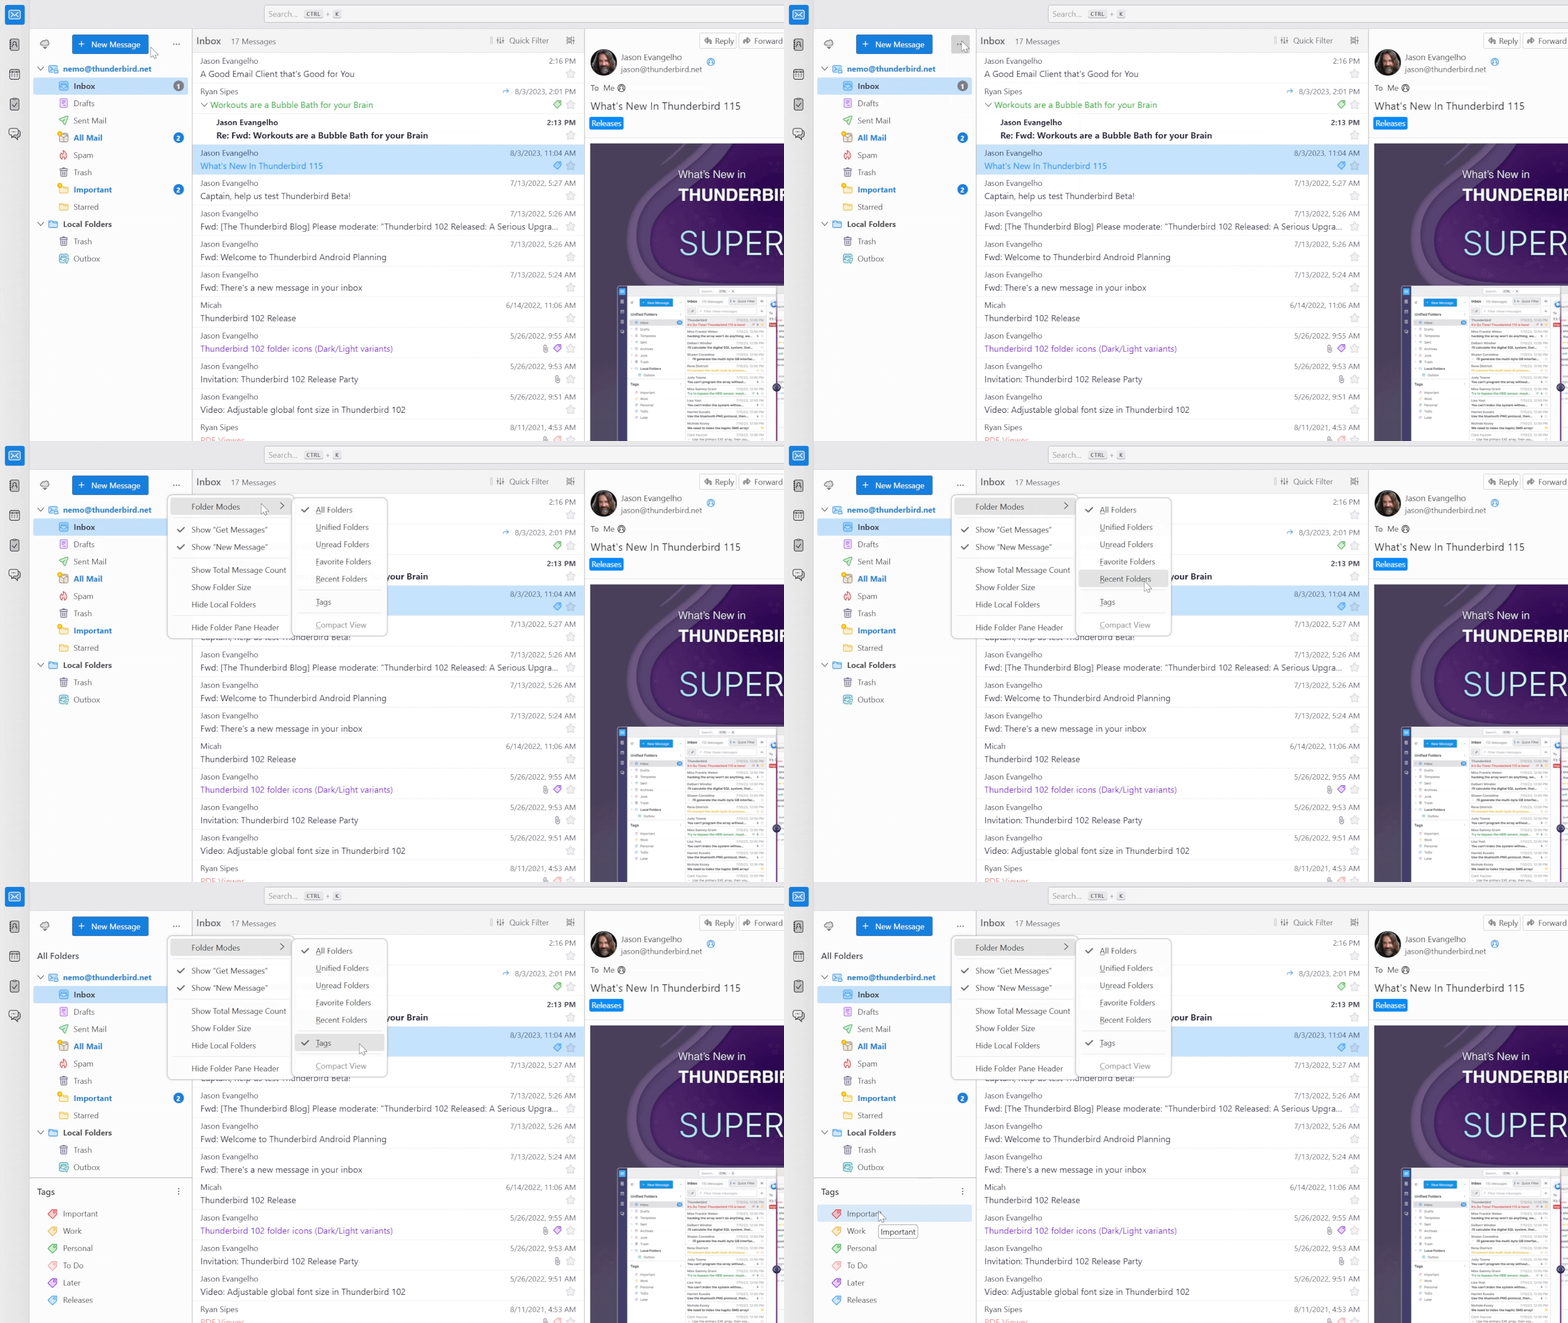
In the Folder Pane Options menu (⋯) next to the “New Message” button, click “Folder Modes” and then choose “Tags.” That’s it! But if you want to continue customizing Thunderbird 115, you can also use this menu to hide Local Folders.

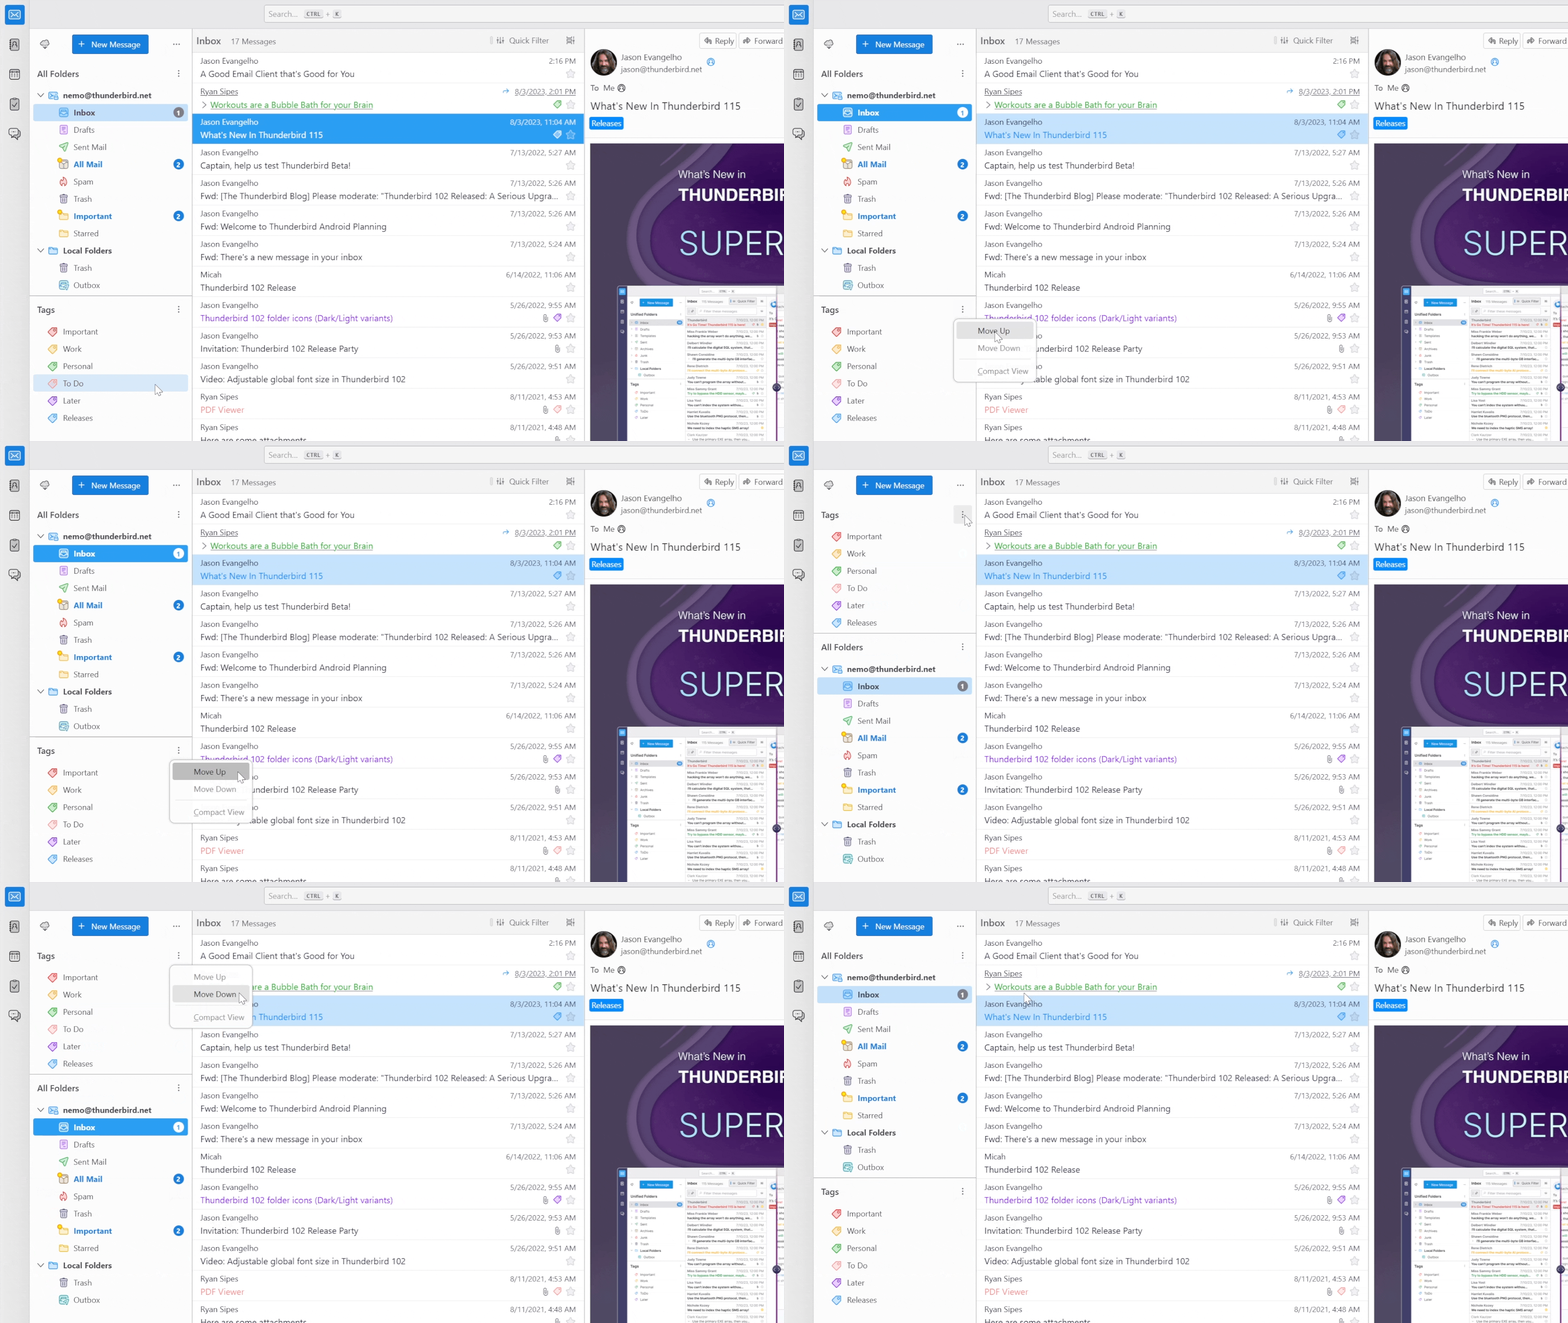
 Tip: Want to move your Tags up or down in the Folder Pane? Click on the 3 vertical dots menu (⋮) next to Tags, and simply choose “Move Up” or “Move Down” as seen in the above GIF.
Step 4: Customize The Message Header

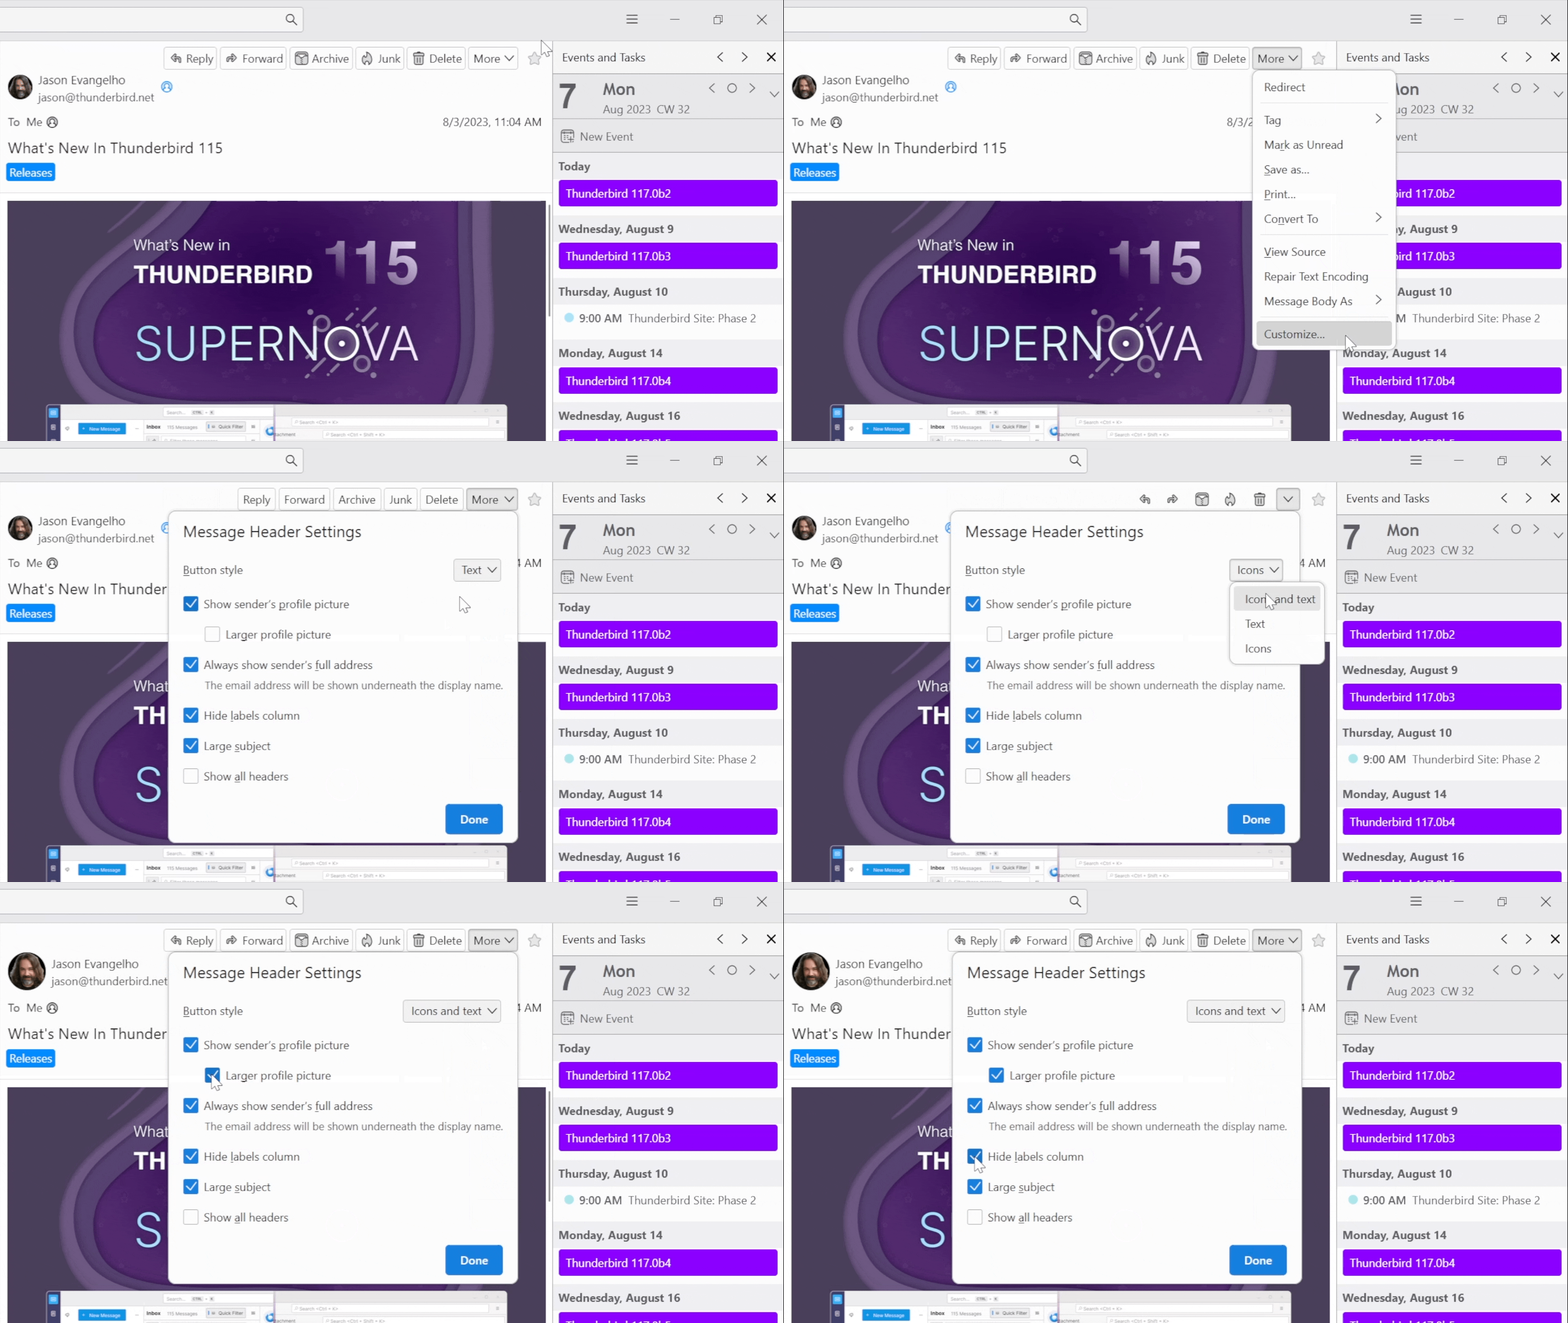
And finally, we arrive at the Message Header Settings. That’s the section at the top of your email showing all the information such as sender’s name, contact photo (which pulls from the Address Book), subject, any associated tags, and more. Configuring this to fit your preferences is easy. Just click the “More” button with the downward facing arrow, then select “Customize” and make it yours!
We hope this helps you enjoy an even better Thunderbird experience. Thanks for being part of the Thunderbird family, and make sure to check back later for more customization guides and usage tips.
The post Make Thunderbird Yours: How To Get The Thunderbird 115 “Supernova” Look appeared first on The Thunderbird Blog.